In today’s digital age, businesses need to have multiple channels to reach their customers. Social media sites like Facebook are among the most widely used outlets. Without writing any piece of code, we can easily integrate Facebook Messenger with the Service Cloud that helps the agents easily communicate with customers and resolve issues. This really helps save budget and have the features which adds value to the business. Voila! Let’s not waste more time and see what is stored in for us.
Here are some key goals that can be achieved by integrating Facebook Messenger with the Service Cloud
1) Customer Support: Facebook Messenger is a wonderful method for offering customer help. Customers’ issues can be handled easily by your agents, who can also deliver a seamless experience.
2) Sales and Marketing: Facebook Messenger can be utilized for these activities as well. The channel can be used to answer client inquiries, deliver product information, and even close deals.
3) Surveys and Feedback: Facebook Messenger is a great platform for running surveys and gathering customer feedback. It can be used to ask for comments, suggestions, and even complaints.
4) Notifications: You can set up notifications for your Facebook Messenger channel to inform customers about order status updates, delivery status updates, and other relevant information.
5) Personalized Messaging: With Facebook Messenger, you can personalize your messaging and provide a more human touch to customer interactions. To give the consumer a more individualized experience, you can use their name, previous purchases, and other details.
Let’s see the process of the Setup
Here are the steps to create a Facebook Messenger channel in Service Cloud
Step 1: Login to your Facebook Account
Before you start, you need a Facebook account, Facebook username, and password. Use this information to authenticate or log in to Facebook, so you can select the Facebook pages to use with Messaging.
Step 2: Access Messaging Settings
From Setup in Lightning Experience, enter “Messaging” in the Quick Find box, and select “Messaging Settings.” This will take you to the Messaging Settings page.
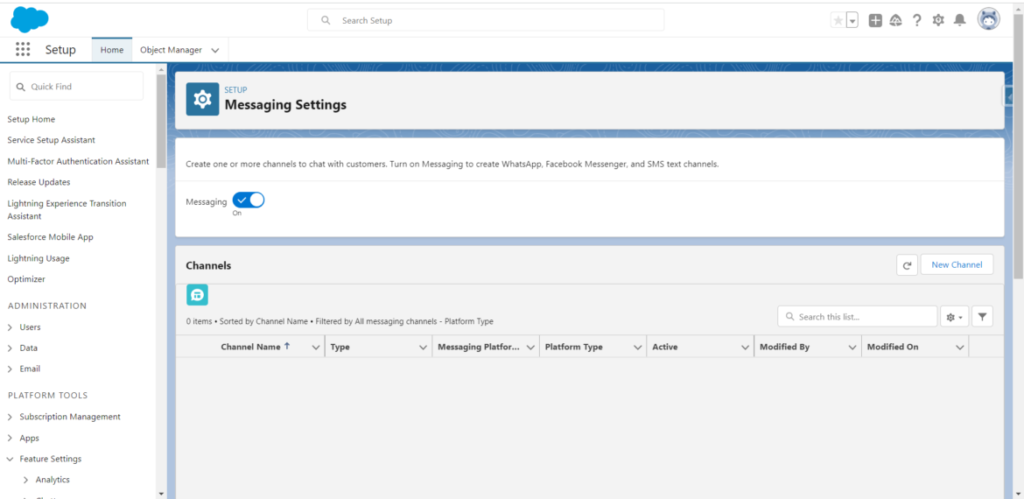
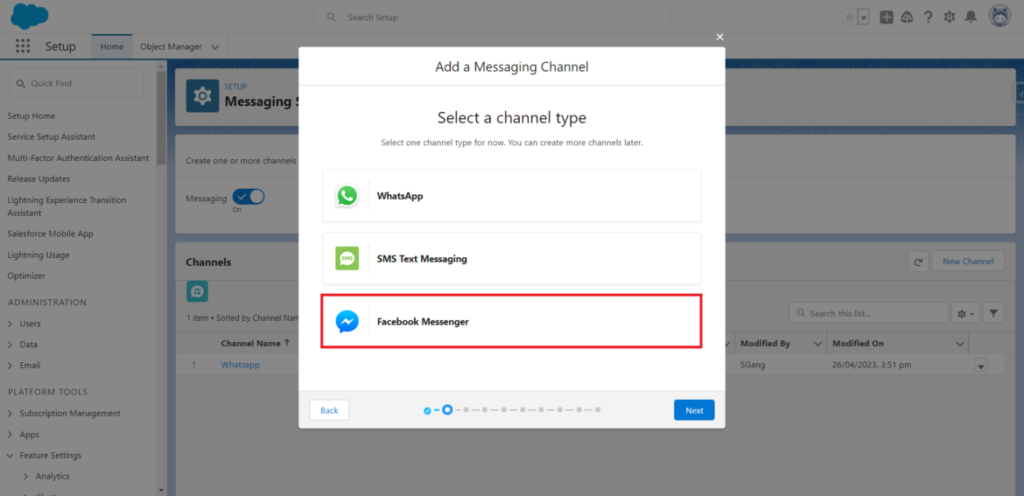
Step 3: Create a New Channel
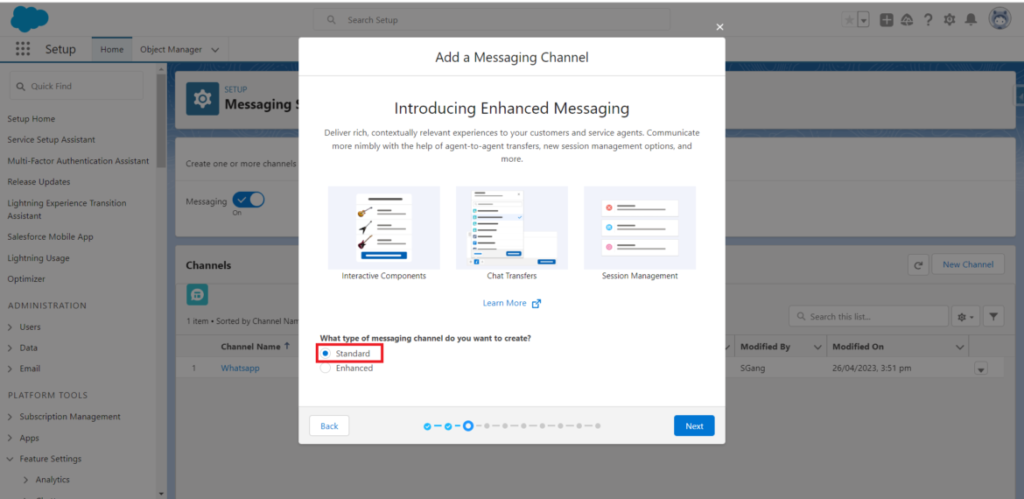
In the Channels section, click “New Channel” and select “Facebook Messenger.” You can choose whether to create a standard or enhanced channel.
📌Standard Channel:
A standard channel provides basic messaging capabilities, allowing customers to initiate a chat session with a support agent. Standard channels are suitable for small businesses with basic messaging requirements. These channels can be useful for quickly getting started with messaging, but may not provide all the advanced features that some organizations require.
📌Enhanced Channel:
An enhanced channel provides more advanced messaging capabilities than a standard channel. With enhanced channels, customers can interact with chatbots, send images and files, and receive proactive notifications. Enhanced channels can be used by businesses that require advanced messaging capabilities and need to support larger volumes of customer interactions.
👉 In general, standard channels are a good option for organizations that are just starting with messaging or that have relatively simple messaging requirements. Enhanced channels are a better choice for organizations that need advanced messaging capabilities, such as supporting chatbots and sending images and files, and have more complex messaging requirements. As of now we are going with the standard channel.
Step 4: Log in to Facebook and Select a Facebook Page
Follow the prompts to log into Facebook and select a Facebook page to use with Messaging. You can only select one Facebook page at a time. If you want to set up more Facebook pages, repeat the process.
Step 5: Set Up Chat Acknowledgment
In the Chat Acknowledgment field, enter a message that’s sent in response to a customer’s initial message. For example, thank the customer and let them know you have their message with an acknowledgement or confirmation.
Step 6: Route Incoming Messages to Agents
This is an important part as is the first step that gets activated when the message is received from the customer. You can choose how to route incoming messages to agents. For this purpose, you can use an Omni-Channel flow to control routing, select “Stop the setup flow” and manually connect to a queue or Omni-Channel Flow. To use a routing configuration, select “Create a new queue” and routing configuration.
Step 7: Configure Routing (For Omni-Channel Flows routing only)
If you select “Create a new queue…”, the flow takes you through the steps to create a queue, create a routing configuration, adjust the agent messaging workload, and exit the flow. If you select “Stop the setup flow…”, the flow ends, and the channel is created, but it’s routing must still be configured.
Step 8: Take Advantage of Other Features
Now that you’ve set up your channel, take advantage of other features to customize the messaging experience for agents and customers. You can set up notifications for your channel, set keywords that customers can use to request help or opt-in and out of receiving messages, add an Einstein bot, and more.
Done with Set-up?
Now Test Your Facebook Messenger Channel in Salesforce
Once you have set up your Facebook Messenger channel in Salesforce Service Cloud, it’s important to test it to ensure that it’s working properly. Testing your channel can help you identify any issues and make any necessary adjustments before you start using it to communicate with customers. Here are the steps to test your Facebook Messenger channel in Salesforce Service Cloud:
1) Log into Salesforce as an agent. From the app launcher, open the app that contains Messaging. This is usually the Service Console.
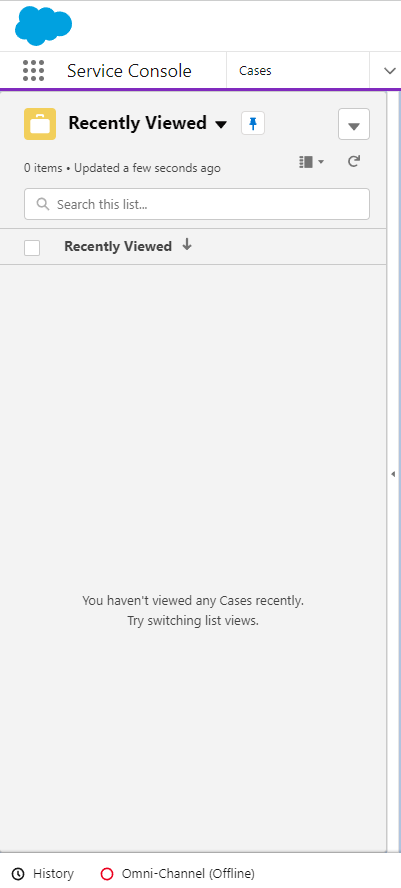
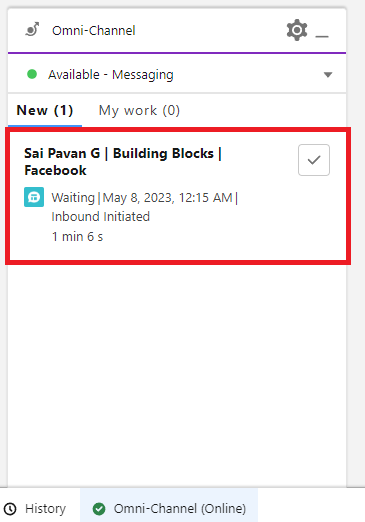
2) Click the Omni-Channel utility in the footer of your screen.
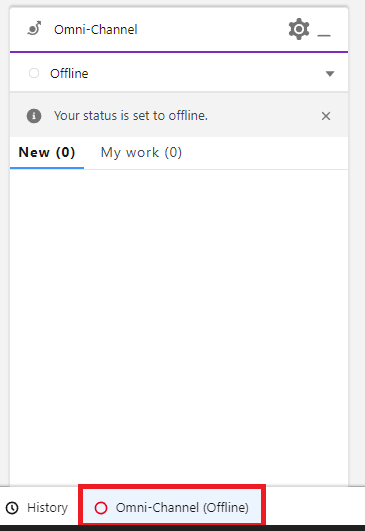
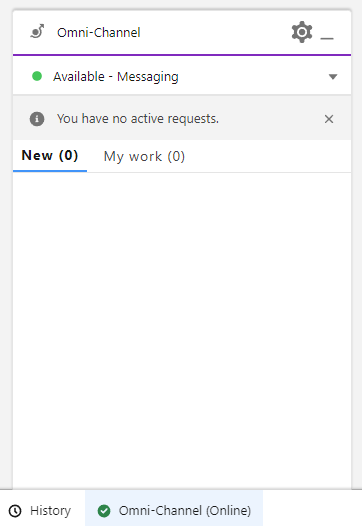
3) Change your Omni-Channel presence status so that you’re online and available to receive messages.
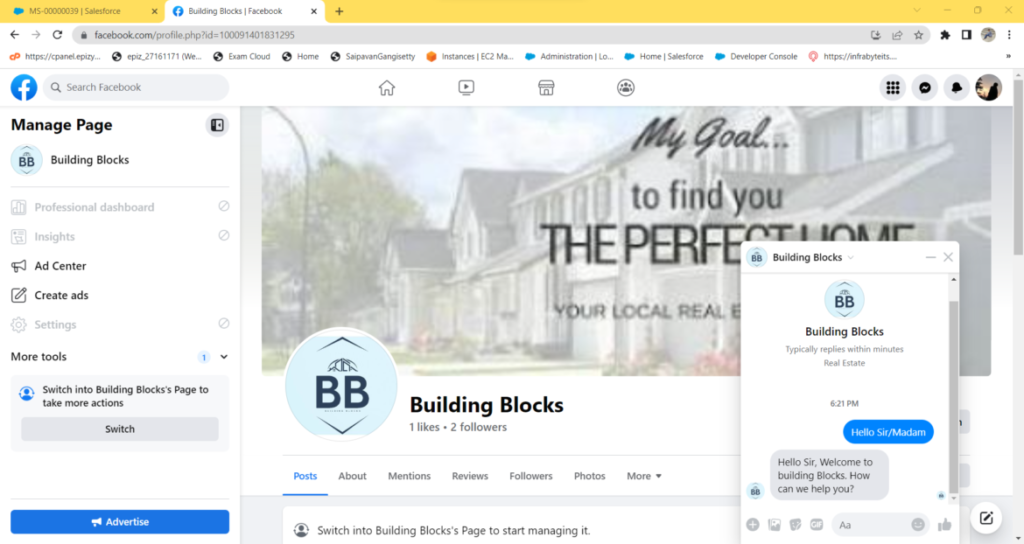
4) In another browser, log into a Facebook account that’s not associated with your channel.
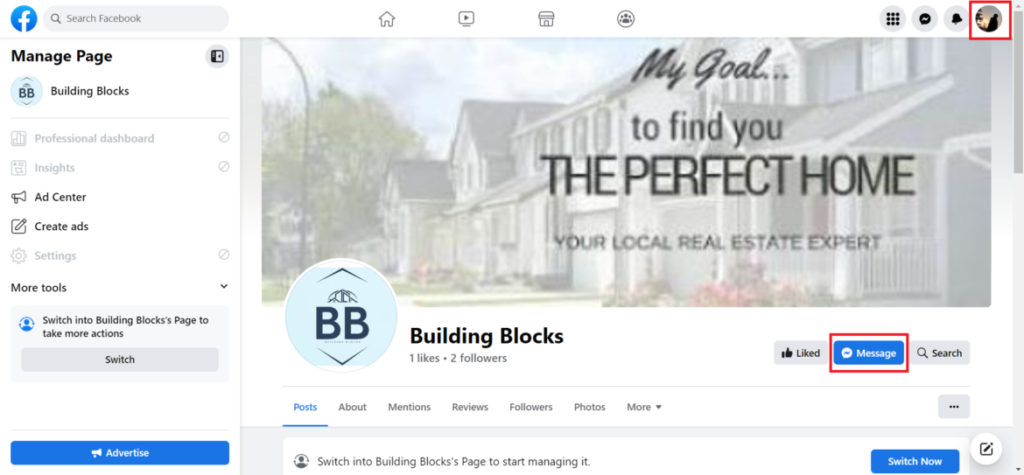
5) In Facebook Messenger, send a message to the Facebook page that is associated with your channel.

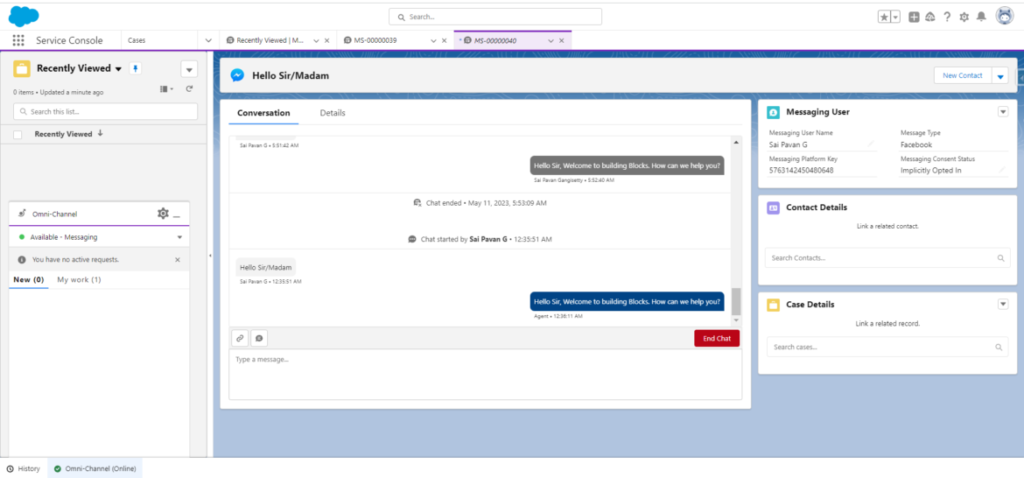
6) Look for the incoming message in the Omni-Channel utility. Click the check mark icon to accept the message and open the chat window.
7) Exchange messages in the channel. Experiment with sending images, files, and quick text, and test the auto-responses that you’ve configured.
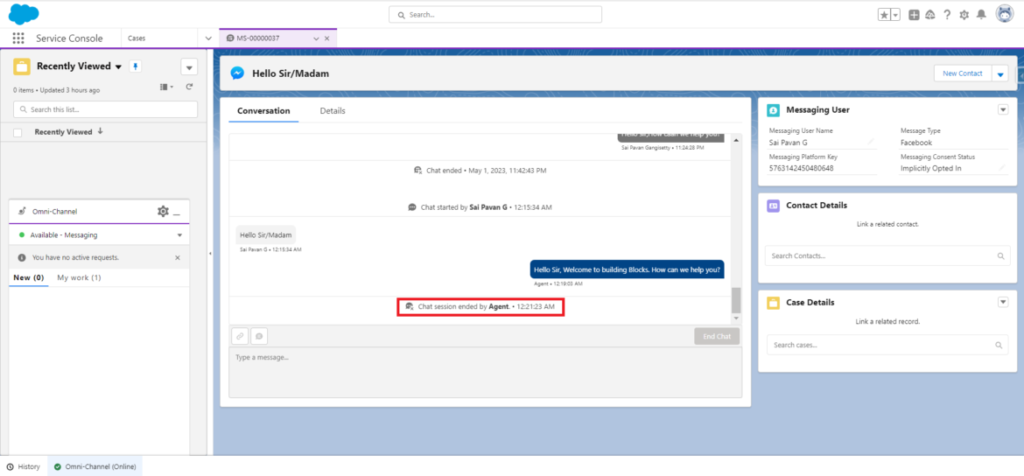
8) When you’re done, click End Chat.
Conclusion:
Setting up a Facebook Messenger channel in Salesforce Service Cloud can provide a powerful new way to communicate with your customers. By following the steps outlined above, you can create a new Facebook Messenger channel and configure it to meet your specific needs, including customizing the chat acknowledgment message and routing incoming messages to the appropriate agents.
Once you have set up your channel, it’s important to test it to ensure that it’s working properly. Testing your channel can help you identify any issues and make any necessary adjustments before you start using it to communicate with customers.
By leveraging the features of Facebook Messenger and Salesforce Service Cloud, you can provide a seamless and efficient customer experience that can help you build trust with your customers and increase customer satisfaction. Whether you’re using Facebook Messenger to provide customer support, sales assistance, or other types of communication, having a well-configured and tested channel can help you achieve your goals and meet your customers needs.