

Agentforce Service Agents have significantly improved how Service teams operate. While commonly associated with chat, they can also be integrated into existing Email-to-Case functionality to deliver a much more robust support experience.
With Email-to-Case already handling case creation, the agent does not need to create records. Instead, it uses its reasoning engine and connected knowledge sources to respond directly to incoming emails.
This approach is especially useful for high-volume, low-complexity queries.
For Everhome Solutions, a home appliances company, internal reporting showed that nearly 60 percent of incoming support emails were basic product guideline questions. These still required manual effort from reps to review documentation and respond. By extending Agentforce into Email-to-Case, these queries can now be handled automatically, allowing reps to focus on more complex issues.
Before starting, ensure the following are in place:
Ensure the configuring user (you) has the following permissions:
Org requirements:
Go to Setup, search for Email-to-Case, and enable it. For this use case, default settings can be retained.
Click Create New Routing Address, provide a routing name and the support email address, and save.
A verification email will be sent to the support inbox. Open it and verify the routing address.
Once verified, Salesforce generates a service email address. This will be used in the next step.
Set up forwarding from the support email to the Salesforce-generated email address.
For Gmail:
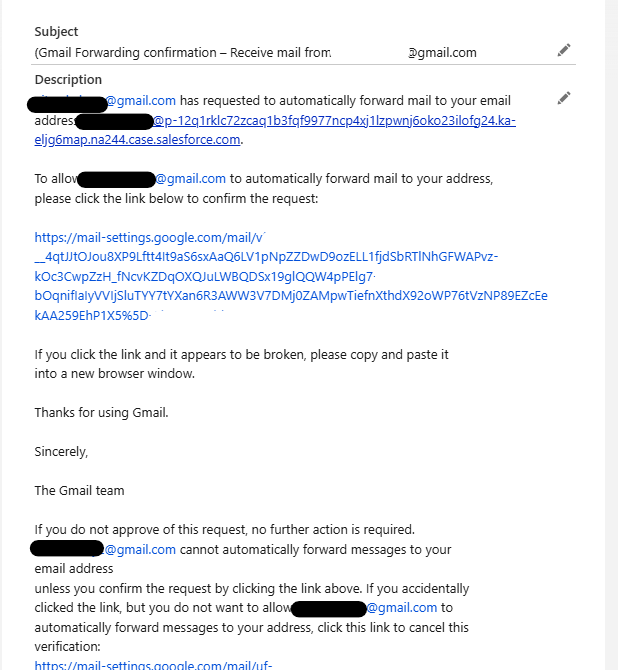
A verification email will be generated as a Case in Salesforce. Open the Case and complete the verification through the link.
Then enable forwarding in Gmail.
At this point, Email-to-Case is fully set up! Any incoming email will now create a Case in Salesforce.
In Setup, search for Agentforce and enable it if not already done.
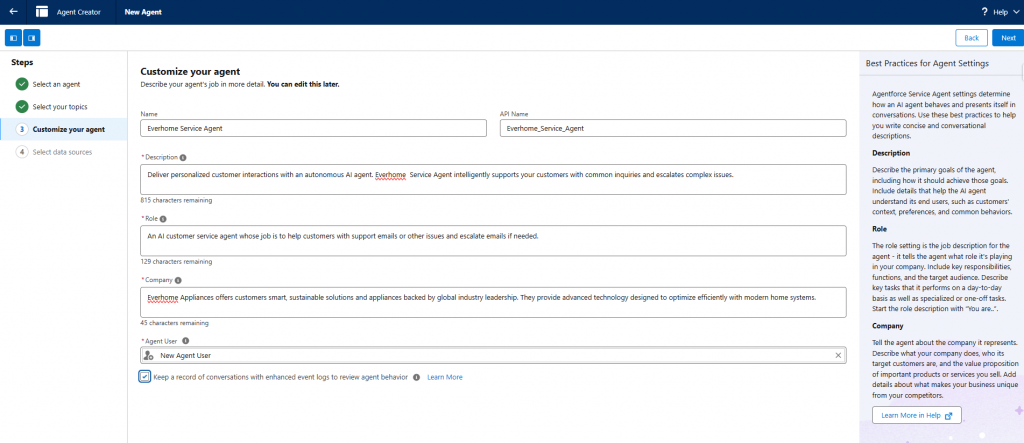
Then search for Agentforce Agents and create a new Service Agent.
Add relevant topics and actions. For Everhome:
Additional topics and instructions can be added depending on requirements.
Create a Data Library, which will act as the knowledge source for the agent.
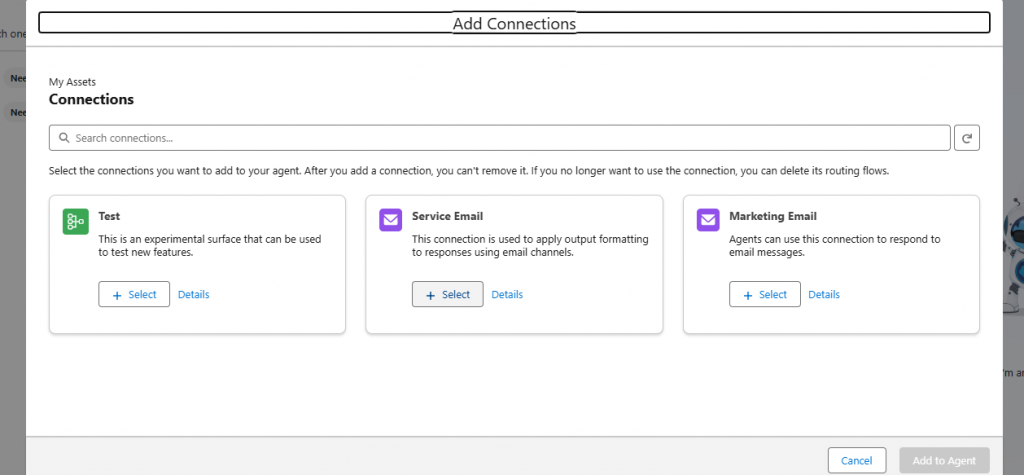
In the Connections tab:
A small but useful step here is updating the agent user’s First Name. This makes it easier to identify the agent user during selection when building routing configuration.
Also ensure that the agent user has access to Cases and any data sources being used.
Test the agent responses at this stage and activate it once validated.
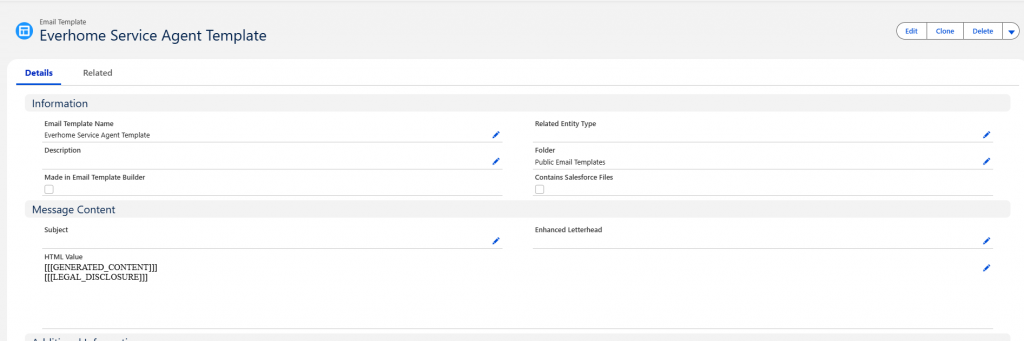
Create a Lightning Email Template and ensure the body contains:
[[[GENERATED_CONTENT]]]
[[[LEGAL_DISCLOSURE]]]
Additional static content such as logos or headers can also be included.
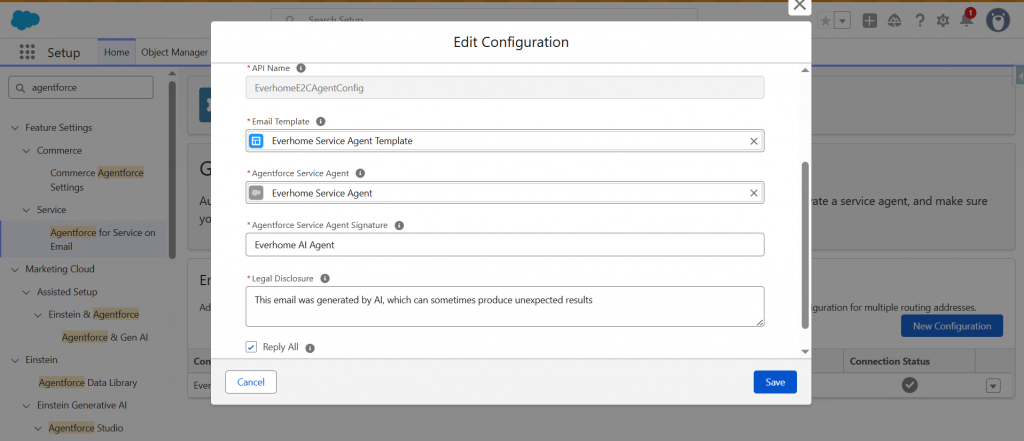
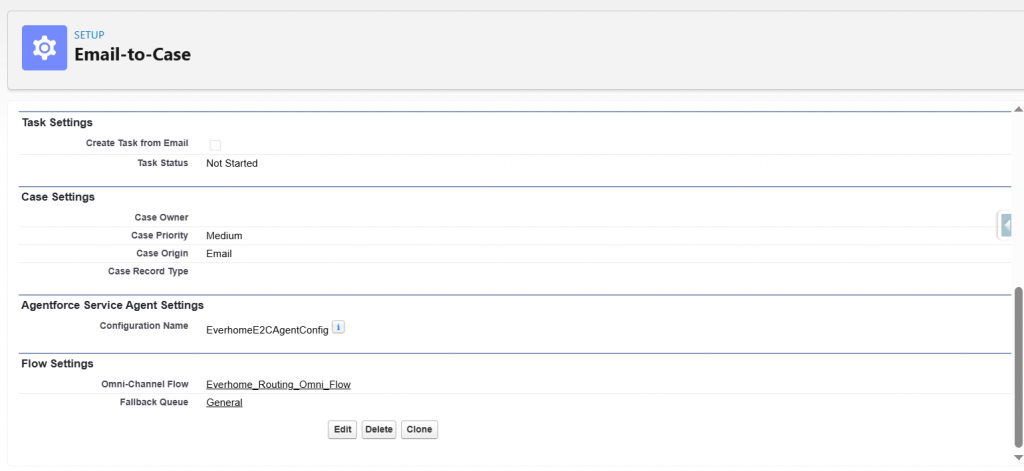
In Setup, search for Agentforce for Service on Email.
Create a new configuration and provide:
Salesforce provides three routing options:
For this setup, Omni-Channel Flow is used for flexibility.
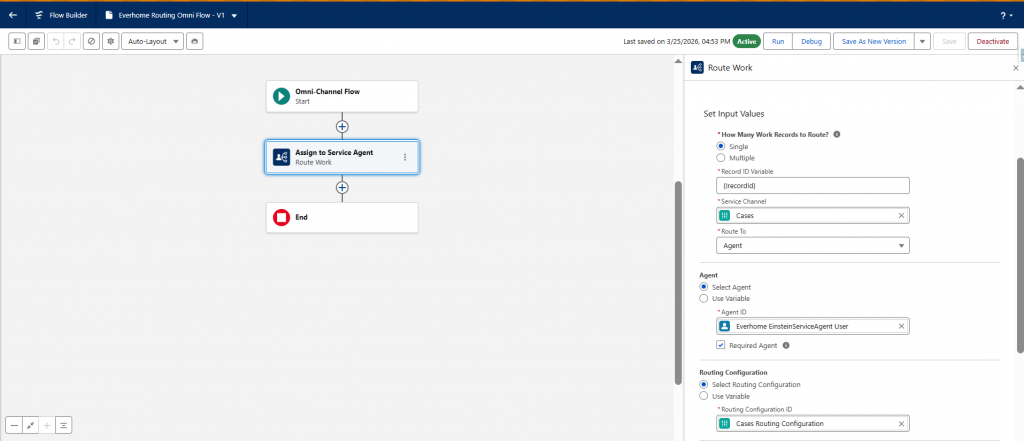
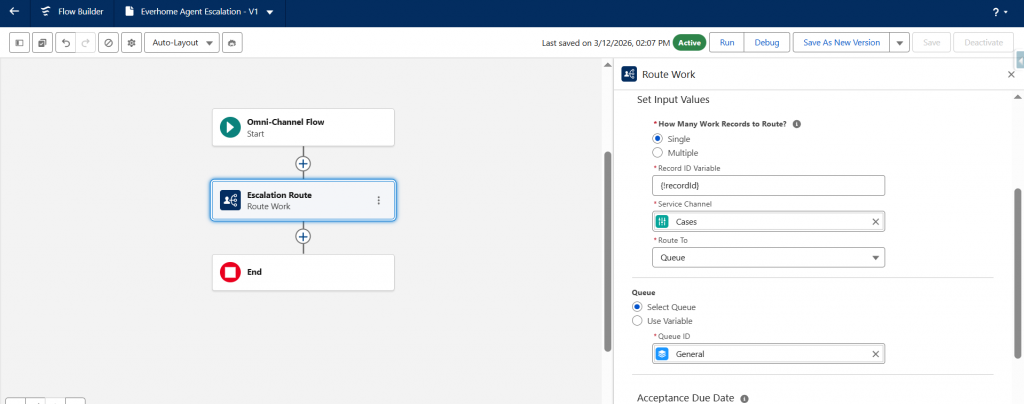
Go to Flows → New Flow → Omni-Channel Flow
Add a Route Work element:
Save and activate the flow.
Return to the Email-to-Case routing configuration.
Update the following:
Create another Omni-channel flow with the Route Work element, this time routing to an active queue for escalation. Activate the flow.
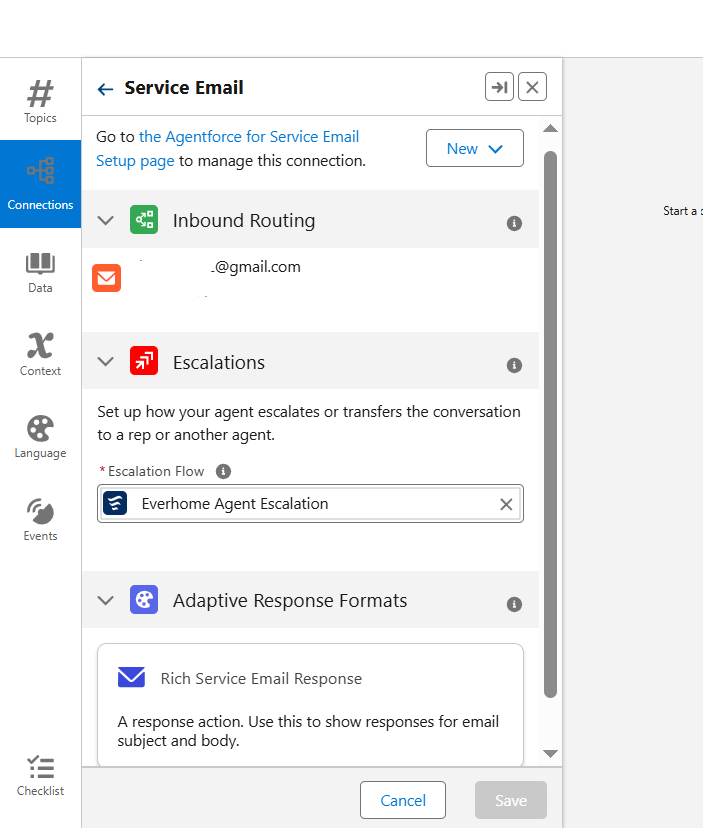
Now go into your agent, in the Connections tab, go into the Service Email connection, and add the flow just created into the Escalation Flow.
Send a test email to the support address.
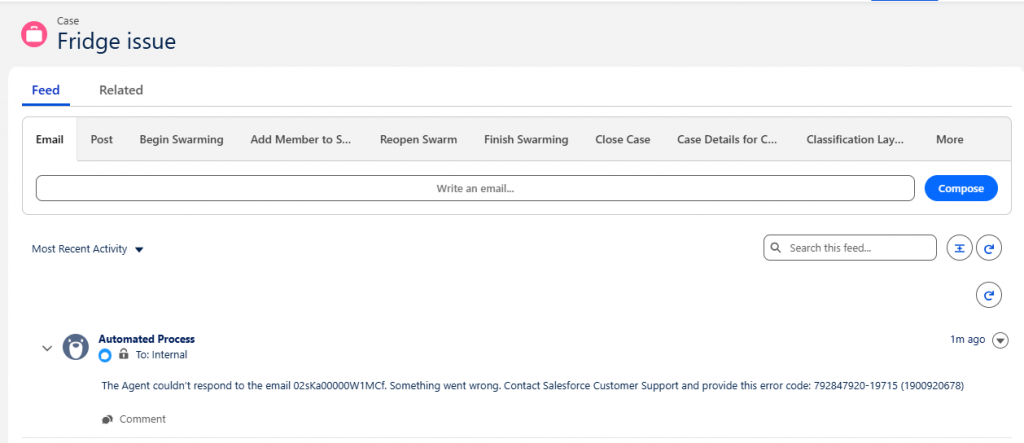
In one test scenario, the case was created successfully but no response was sent. On reviewing the Case Activity, the agent had logged a comment and reassigned the case to the default owner. The issue was traced back to missing permissions on the Case object for the agent user.
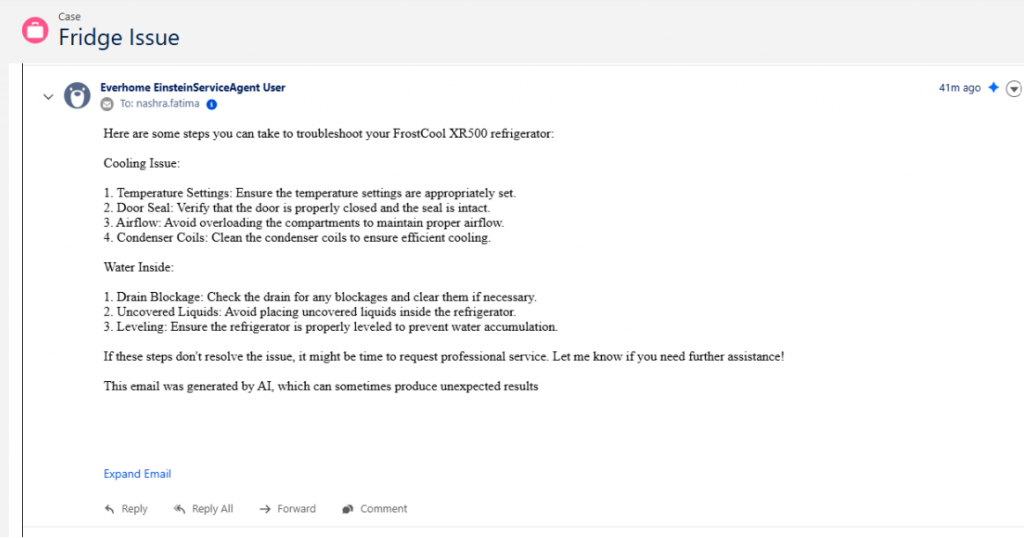
After correcting the permissions and testing again, the agent successfully generated a response using its knowledge base.
With this setup in place, Everhome Solutions can automatically handle a large portion of incoming support emails. The Agentforce Service Agent responds to common queries instantly, while more complex cases are routed to human agents, improving overall efficiency and response times.
Author: Nashra Fatima