
In today’s digital-first world, customers expect fast, accurate, and personalized support — often via the platforms they use every day, like Facebook Messenger or Whatsapp Messenger. To meet these expectations, businesses are increasingly turning to conversational AI to handle routine queries and reduce wait times. But not every conversation is simple — and when complexity arises, customers still want the reassurance of speaking to a real human. That’s where Agentforce steps in — Salesforce’s next-generation AI agent platform that blends automation with empathy. Designed to work across multiple channels, Agentforce enables organizations to scale operations, enhance customer engagement, and boost efficiency by allowing AI agents to handle high-volume, repetitive tasks while humans focus on strategic and emotional conversations. What sets Agentforce apart is its intelligent reasoning engine, Atlas, that enables AI agents to make thoughtful, context-aware decisions by accessing structured and unstructured business data in real time. It can dynamically adapt to new information, reduce the risk of error, and escalate issues seamlessly when human intervention is needed through Omni-Channel routing.
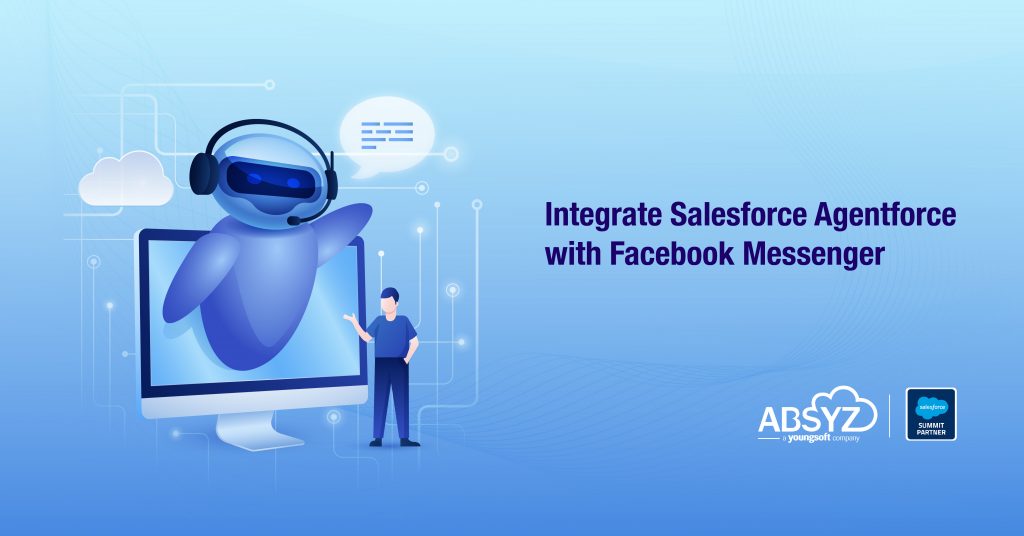
By integrating Agentforce with Facebook Messenger, businesses can create an experience where bots offer instant, intelligent responses and gracefully pass the conversation to a live agent when necessary.In this blog, we’ll walk through how to implement this integration. You’ll learn how to set up Agentforce to engage users on Facebook Messenger, configure routing flows for automated and human handoffs, and test the end-to-end experience.
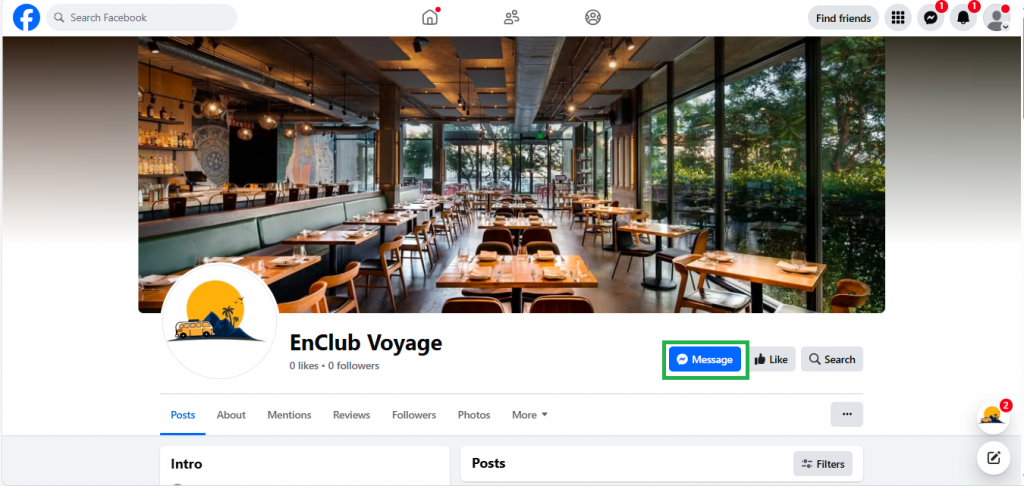
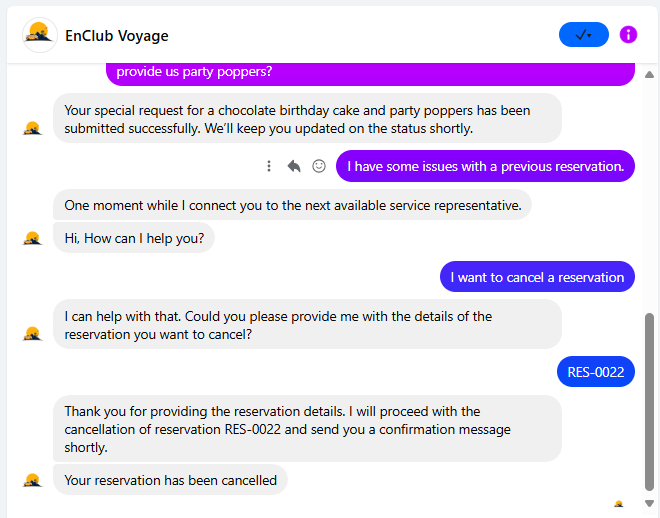
Let’s imagine a cozy, upscale restaurant called EnClub Voyage. To stay connected with its growing community of diners, the restaurant actively manages a Facebook page called EnClub Voyage. Customers visit this page not just for updates or reviews, but to book reservations, make changes to existing bookings, or even to submit special dining requests like dietary needs or anniversary surprises. To streamline these interactions and reduce the burden on their staff, EnClub Voyage has deployed a Service Agentforce Agent directly on their Facebook Messenger channel. This intelligent virtual assistant is available 24/7 and is capable of making new reservations, modifying existing bookings such as changing date or time and accepting special requests. What truly enhances the experience is the agent’s ability to recognize when it’s out of depth. If a customer asks a question that falls outside the scope of what the AI can handle, say a complex allergy concern or a complaint the Agentforce Agent can seamlessly transfer the conversation to a live human agent via Salesforce’s Omni-Channel routing.
This combination of always-on AI and human backup allows EnClub Voyage to offer both instant, intelligent service and personalized, human touchpoints – the best of both worlds.
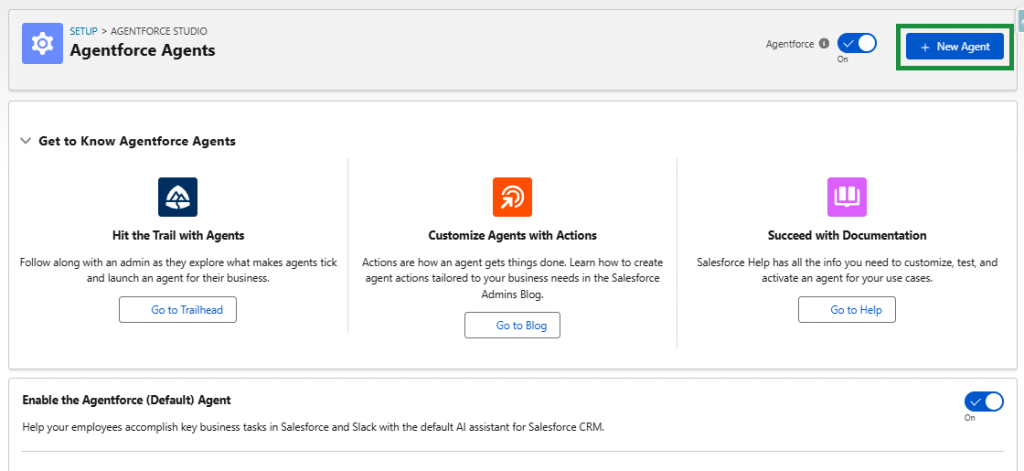
To begin, search for “Agentforce Agents” in the setup and make sure Agentforce is enabled in your Salesforce org. This will allow you to build and manage conversational bots directly from within the platform.
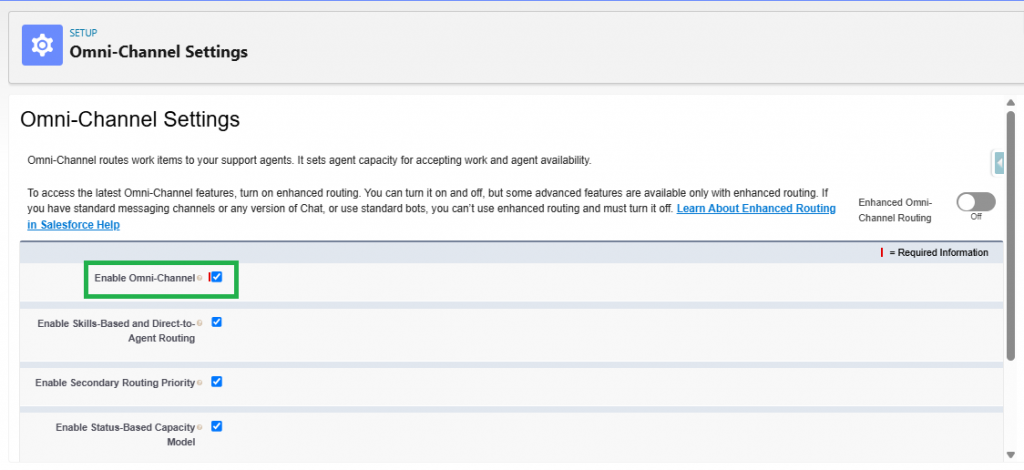
Similarly, search for “Omni-Channel Settings” in the setup and make sure that omni channel is enabled. This must be active to handle message routing whether to a bot or a live agent.
Once both are enabled, you can move on to building your bot, and connecting it to messaging channels.
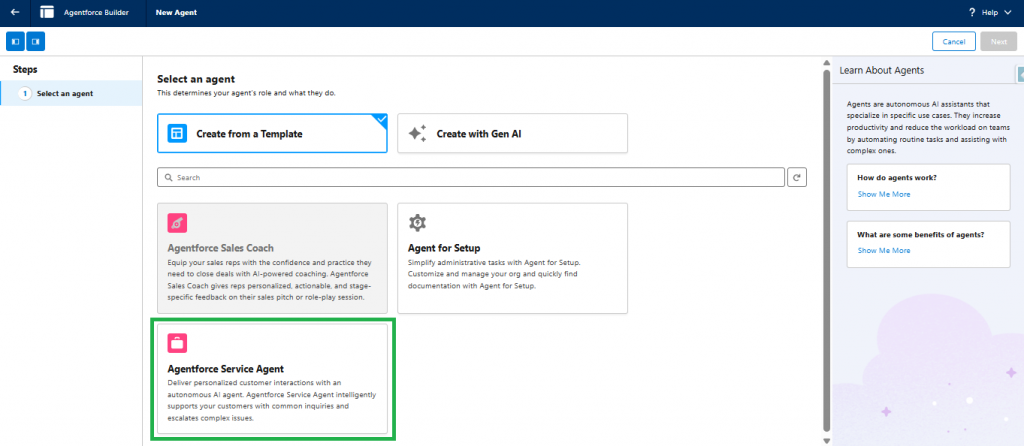
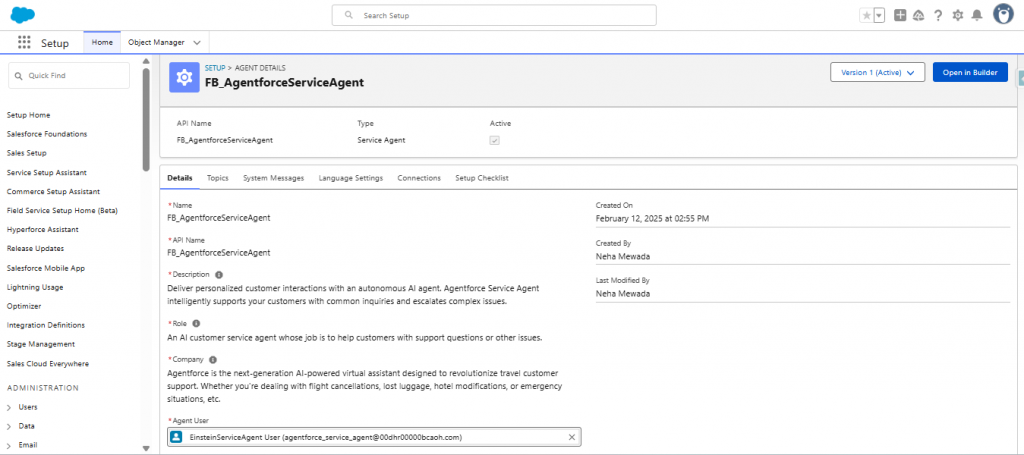
Start by creating an Agentforce Service Agent, which acts as your primary chatbot. During the setup, provide basic details such as the agent’s name, role, and a brief description. You’ll also select the topics this bot will support — for example, reservation management, status checks, or special requests. Make sure to include “Escalation” as one of the topics, which is critical for triggering a handoff to a human agent when needed.
The agent needs a Salesforce user to operate under. You can create this user from within the Agentforce setup screen. Once that’s done, launch the Agent Builder to define your bot’s responses and flow logic, and then activate the agent.
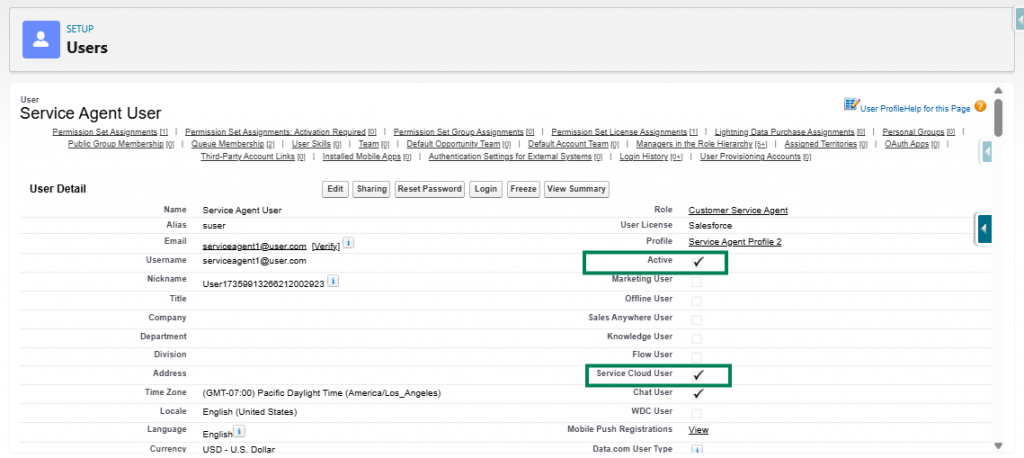
Once the Service Agentforce agent is created, you have to ensure that you have a service live agent to whom your agent can transfer the requests to. For this, clone the Standard User profile and create a “Service Agent Profile.” Then, create a user under this profile, enabling the Service User.
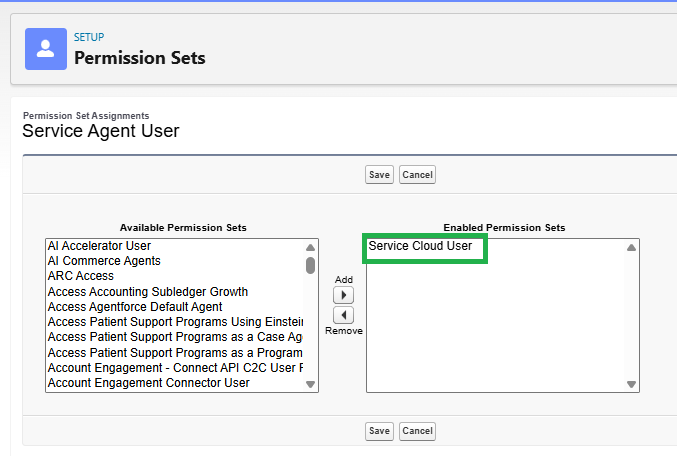
Also, assign the Service Cloud User permission set to any users acting as live agents.
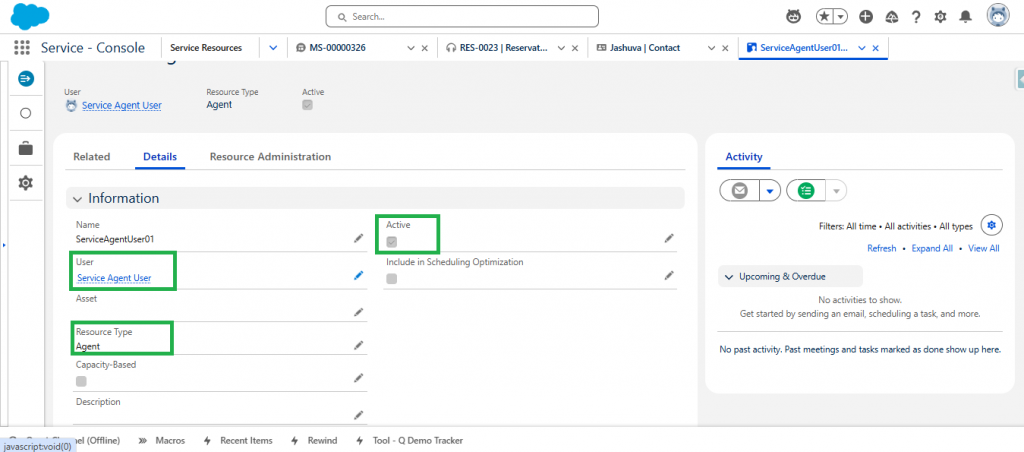
Now from the App Launcher, search for Service Resource and create a service resource record for the created user with active status.
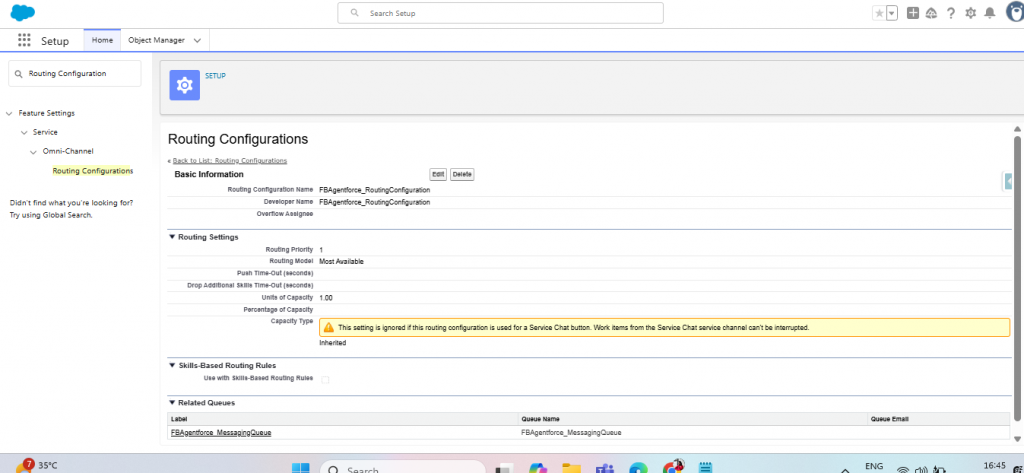
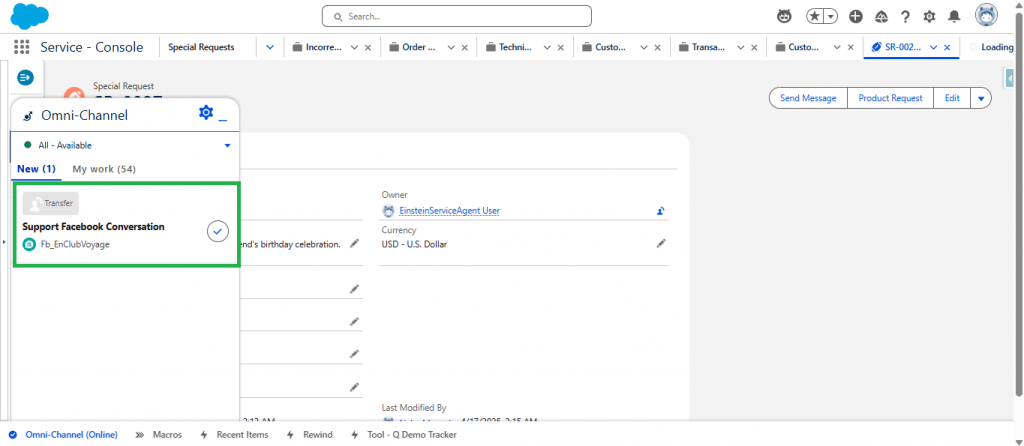
Now to route messages intelligently to this live agent, we configured a Routing Configuration (e.g., FBAgentforce_RoutingConfiguration) that prioritized availability and balanced workload using a simple capacity model. This setup allowed the system to evaluate which agents were most available at any moment.
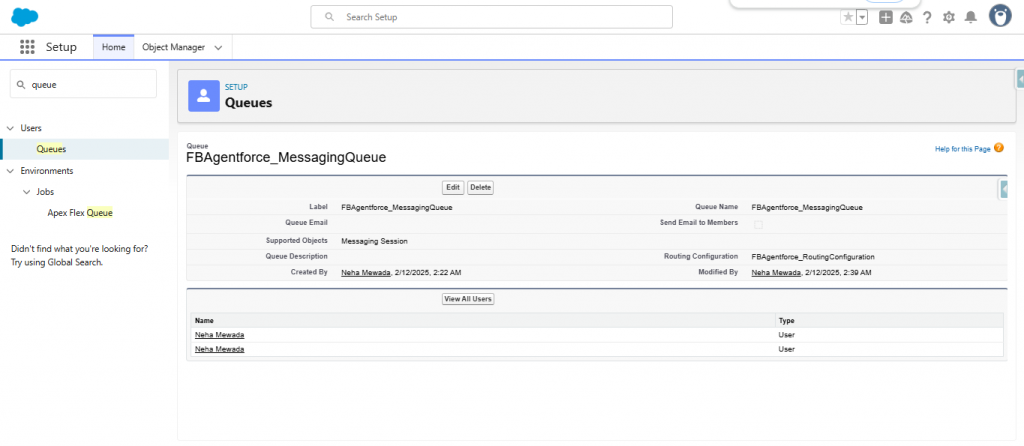
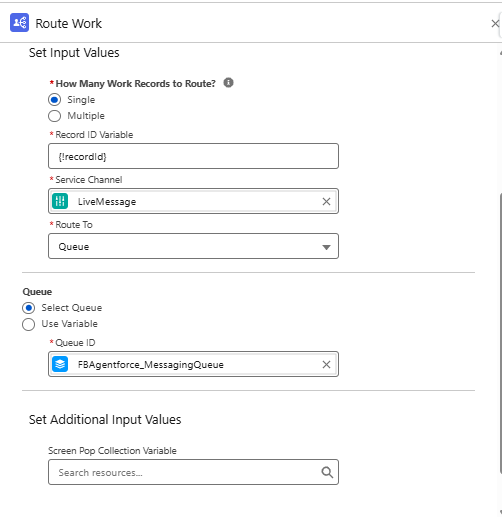
We then created a Queue (e.g., FBAgentforce_MessagingQueue) to house our live agents and assigned the earlier routing configuration to it. By adding specific users to this queue, we ensured that escalated conversations would always reach the right human support team.
With the agentforce agent created and user setup complete, the next step is to build the routing logic for incoming messages and escalation scenarios.
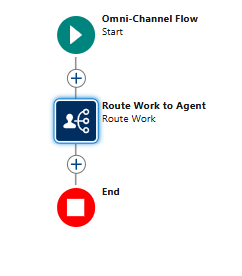
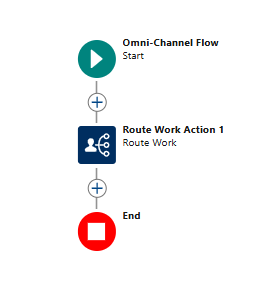
This involves creating two Omni-Channel Flows:
2. The Outbound Flow is triggered when the bot decides to escalate the conversation, transferring it to a human agent via a predefined queue. This flow also accepts a recordId and directs the message to the designated queue, allowing a live service agent to take over when needed. Once both flows are saved and activated, they become the backbone of our routing logic.
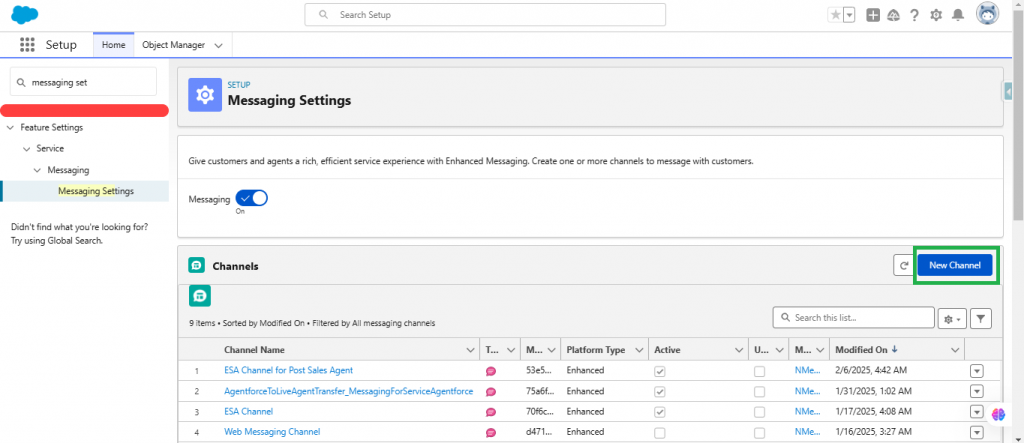
Start by enabling Messaging within Salesforce, for this search for Messaging Setting in the setup.
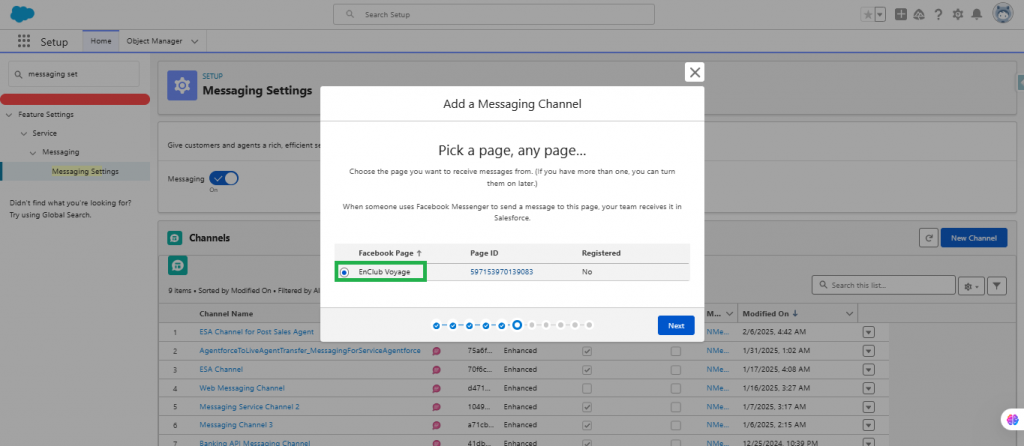
Then, add a new Messaging Channel and choose Facebook Messenger. You’ll be prompted to authenticate with Facebook and select a Page to connect.
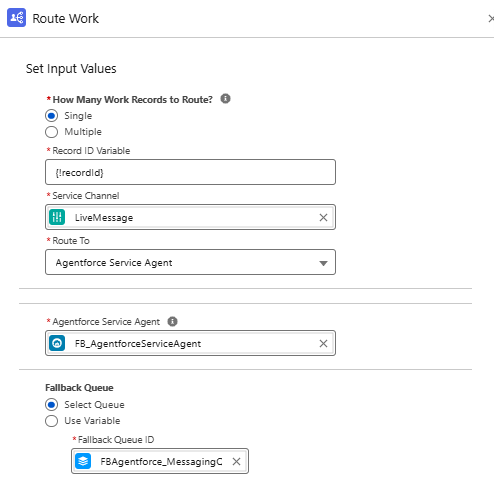
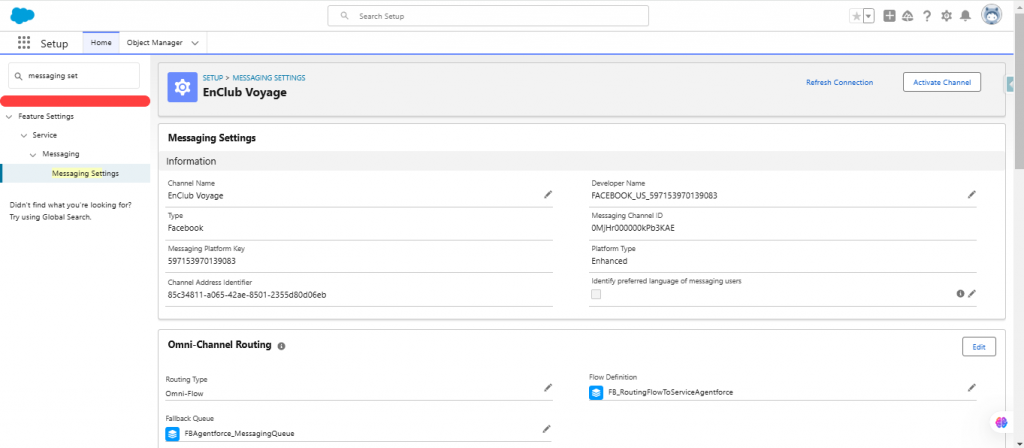
During this process, you’ll select “Setup Routing later” for routing configuration and complete the set up. Under the Omni-Channel Routing of the channel you created, add the Omni flow routing as the Inbound flow you created earlier, which routes the case to agentforce agent. And set the fallBack Queue as the outbound flow you created earlier, which routes the case to a Live service agent. Make sure to save these changes and activate the channel.
To enable smooth transitions from bot to human, revisit your Agentforce agent in the Agent Builder. Navigate to the Connections section and define the Outbound Flow, this is the flow that sends escalated conversations to a live agent. Save your changes and activate the agent. At this point, the entire experience from bot interaction to human intervention is wired and ready to go.
With everything in place, it’s time to test your setup. Head to Facebook Messenger and send a message to your connected Facebook Page.
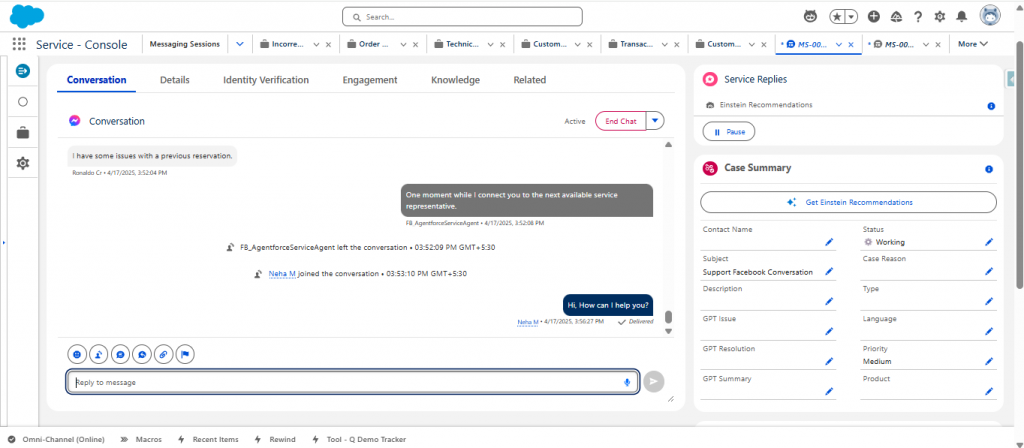
The Agentforce bot will greet you and request basic details, such as your email, to initiate the session based on the Agent actions you have set up for the Reservation topic. Try typing a request that is outside the scope of the bot’s abilities, something intentionally ambiguous or emotional. Upon realizing it cannot assist further, the bot will trigger an escalation to a live agent.
In Salesforce, an available agent from the Omni-Channel queue will receive the session and continue the conversation.
This confirms the bot is functioning correctly and that your fallback to human support is working as expected.
This integration bridges the best of both worlds: the efficiency of intelligent automation and the empathy of real-time human support. By connecting Agentforce with Facebook Messenger, your support team can handle high volumes of customer inquiries while still maintaining that crucial human connection when it matters most. Whether you’re running a restaurant, travel agency, retail brand, or customer support center, this setup provides a scalable yet personal solution to delight your users right where they already are on Messenger.
Note : Stay tuned for Part II, where we’ll dive deeper into Slack integration with Agentforce. The link will be added here once it’s live!
Author: Aparna OV & Jashuva P